It’s a-BAO-t time!  Quick and easy steamed buns

Clamshell Steamed Buns stuffed with sesame tofu, quick picked carrots, cucumber, and cilantro

Clamshell Steamed Buns stuffed with sesame tofu, quick picked carrots, cucumber, and cilantro

It’s no secret that bread is my all time favourite food.  The only things that could possibly come close to that doughy love fest are butter, cheese, and salt and, let’s be honest, all of those things are just made better with the addition of a big old hunk of freshly baked bread. 

From watching the yeast wake up from its long slumber and kneading it into a big mound of powdery flour to digging into fresh and lofty loaves, my love affair with bread is totally and completely consuming.

Now, I can’t argue with the fact that a perfect golden brown crispy crust is a thing of pure beauty.  Whenever I pull a loaf from the oven or am out and about shopping for my starchy love, I can’t help but think of that scene in Ratatouille where Colette is trying to teach Linguini (and, in turn, Remy) about good bread:

How can you tell how good bread is without tasting it?  Not the smell, not the look, but the sound of the crust.  Listen… Oh, a symphony of crackle!

But what about bread that has never seen the heat of an oven?  When does it get it’s due? 

Enter the wondrous culinary invention that is the steamed bun!

No, it does not have a crispy golden crust but, boy oh boy, do I ever love me some steamed buns!  Not only is my recipe for steamed bun dough super simple, it cooks up in around 10 minutes so you can be digging in to some excellent eats in no time flat!  Another bonus?  These steamed buns (or bao) can be totally customized through shaping and stuffing so feel free to let your imagination run wild!

If you're looking for a little bit of help when it comes to shaping clamshells or stuffed bao, check out this segment I did with my gal Veronica Cham on Your Morning!


Steamed Bun Dough

Makes 24 - 30 buns

1 cup + 2 tablespoons very warm water
1 tablespoon instant active dry yeast
3 cups all-purpose flour
¼ cup sugar
1 tablespoon kosher salt
3 tablespoons dry milk powder
1 teaspoon baking powder
2 tablespoons shortening or lard, room temperature
1 tablespoon vegetable oil, if making clamshell shaped buns

In glass measuring cup, combine the warm water and yeast and give it a bit of a stir.  Set this mixture aside for about 10 minutes to allow the yeast to develop.

Meanwhile, in a large bowl or the bowl of a stand mixer, combine the flour, sugar, salt, dry milk powder, and baking powder and make a well in the middle.  Once the yeast is nice and foamy, pour the mixture into the well, add in the shortening, and mix to combine.  Knead the dough on low for 8 – 10 minutes if using a stand mixer, or by hand for 10 – 12 minutes.  After kneading, the dough should gather into a ball and be soft but not sticky.

Lightly grease a large, clean mixing bowl with cooking spray and transfer the ball of dough into the bowl.  Cover with plastic wrap and a clean kitchen towel and place in a warm area for 1 ½ hours or until the dough had doubled in size.

When risen, punch the dough down and divide into 2 equal pieces. 

Now is the time to decide on the shape you’d like your steamed buns to be!  If you would like clamshell shaped buns, roll each piece of dough into a 4-5 inch-long oval with a rolling pin.  Lightly brush the ovals with vegetable oil, lay a chopstick horizontally across the narrow centre of the oval, and fold over onto itself to form a kind of taco shape.  Gently pull the chopstick out, place each bun on a small piece of parchment paper, and allow the buns to rise on a baking sheet, covered in plastic wrap, for 20 - 30 minutes.

If you are looking for a classic bun shape, just roll the pieces into tightly skinned little rounds, place on small squares of parchment paper (about 3” square), and allow the buns to rise on a baking sheet, covered in plastic wrap, for 20 - 30 minutes.  

If you want to fill your bao, flatten balls of dough into circles that are a little thicker in the middle, fill, and crimp.  Check out this video for a little demo of stuffing bao!

Set up your steamer and, working in batches to avoid crowding, steam the classic round buns for 13-15 minutes or clamshell buns for 10 minutes.  Serve warm with anything your heart desires!

If you have any extra buns, they are great stored and served at room temperature, reheated in a steamer, or can be frozen in a tightly sealed zip top bag for up to two months.

Roasted Beet Borscht is basically spring in a bowl

Roasted Beet Borscht

Roasted Beet Borscht

After a long and indecisive winter where snow was rarely seen yet big puffy coats were a must, it’s finally officially spring!  On days like today, I spend the hours trying to soak up as much of this lovely sunshine as I can while holding back hopes that Old Man Winter has hung up his hat for good this year. 

A girl can dream but we here in Southern Ontario know that late March snowstorms are pretty much a given so I’m not holding my breath.

When the sun is shining and spring is trying to break through, I start craving brighter flavours but that threat of winter’s last hurrah keeps me wanting more hearty fare.  It is on days like these that I crave a big old bowl of roasted beet borscht.  The roasty flavour of this cheerful magenta hued soup swirled with fresh green gremolata and dreamy crema is just what the doctor ordered.  It’s hearty enough to keep you satisfied on cold wintery nights but bright enough in both looks and flavour to usher in mild spring days.


Roasted Beet Borscht

Serves 4

5 medium/medium large beets, peeled
3 medium carrots, peeled
1 medium red onion, peeled
4 cloves garlic, skin on
6 sprigs fresh thyme
2 tablespoons extra virgin olive oil
½ teaspoon salt
¼ teaspoon pepper
4 cups low or no sodium chicken or vegetable broth
1 tablespoon vodka, optional
1 – 2 tablespoons syrupy balsamic or red wine vinegar
2 teaspoons prepared horseradish
1 teaspoon Dijon mustard
2 teaspoons lemon juice, or more to taste
Salt and pepper, to taste
Lemon Horseradish Crema, to garnish, recipe follows
Gremolata-y Olive Oil, to garnish, recipe follows

Preheat your oven to 400F and line a sheet pan with aluminum foil to make cleanup easier.

Meanwhile, prepare your beets and carrots by dicing into roughly 2” chunks and cut your onion into six wedges.  Toss all of your vegetables including the garlic and thyme onto your prepared sheet pan and drizzle with olive oil.  Mix well so that all of the veggies are evenly coated with oil and spread into an even layer.  Season with ½ teaspoon salt and ¼ teaspoon pepper and pop this into your preheated oven for 30 minutes, stirring once midway through.

When your veggies are done roasting, pop all of the garlic cloves out of their skins, discard all of the papery bits, and transfer the whole pan of veggies into a medium/large pot along with the chicken or vegetable stock.  Set this over medium heat to simmer for about 50 minutes or until the vegetables are very tender.

Carefully remove the sprigs of thyme and transfer the mixture into a blender to puree until very smooth.  You might need to do this in a couple of batches and do be careful of the steam.  Also, it’s important to open the lid valve of the blender and cover with a clean dish towel when you blend.  If you don’t, you will have quite the mess on your hands!

Once your soup is nice and smooth, transfer it all back into your pot and place over low/medium-low heat.  Stir in the vodka (if using), vinegar, prepared horseradish, mustard, and lemon juice, to taste.  Season with salt and pepper, cover, and cook for another 10 minutes or so to allow all of the flavours to meld. 

Serve hot or cold topped with Lemon Horseradish Crema and herby Gremolata-y Olive Oil (recipes follow) and revel at that beautiful magenta hue!


Lemon Horseradish Crema

¼ cup sour cream
¼ cup plain yogurt
2 tablespoons prepared horseradish
1 teaspoon salt
¼ teaspoon pepper
1 teaspoon lemon zest
1 tablespoon lemon juice

Mix all of the ingredients in a medium bowl and keep cold until ready to use.

This crema is as delicious on roasted beet borscht as it is alongside roast beef and potatoes.


Gremolata-y Olive Oil

2 tablespoons finely chopped fresh parsley
2 tablespoons finely chopped fresh dill
2 cloves garlic, very finely minced
1 tablespoon lemon zest
1 teaspoon lemon juice
2 tablespoons extra virgin olive oil
Salt and pepper to taste

Mix all of the ingredients in a small bowl and allow the flavous to meld at room temperature for at least 20 minutes.

Serve a tablespoon or so swirled into a big bowl of roasted beet borscht or as a sauce for chicken or fish.

Store leftovers in an airtight container and keep in the fridge for up to a week.

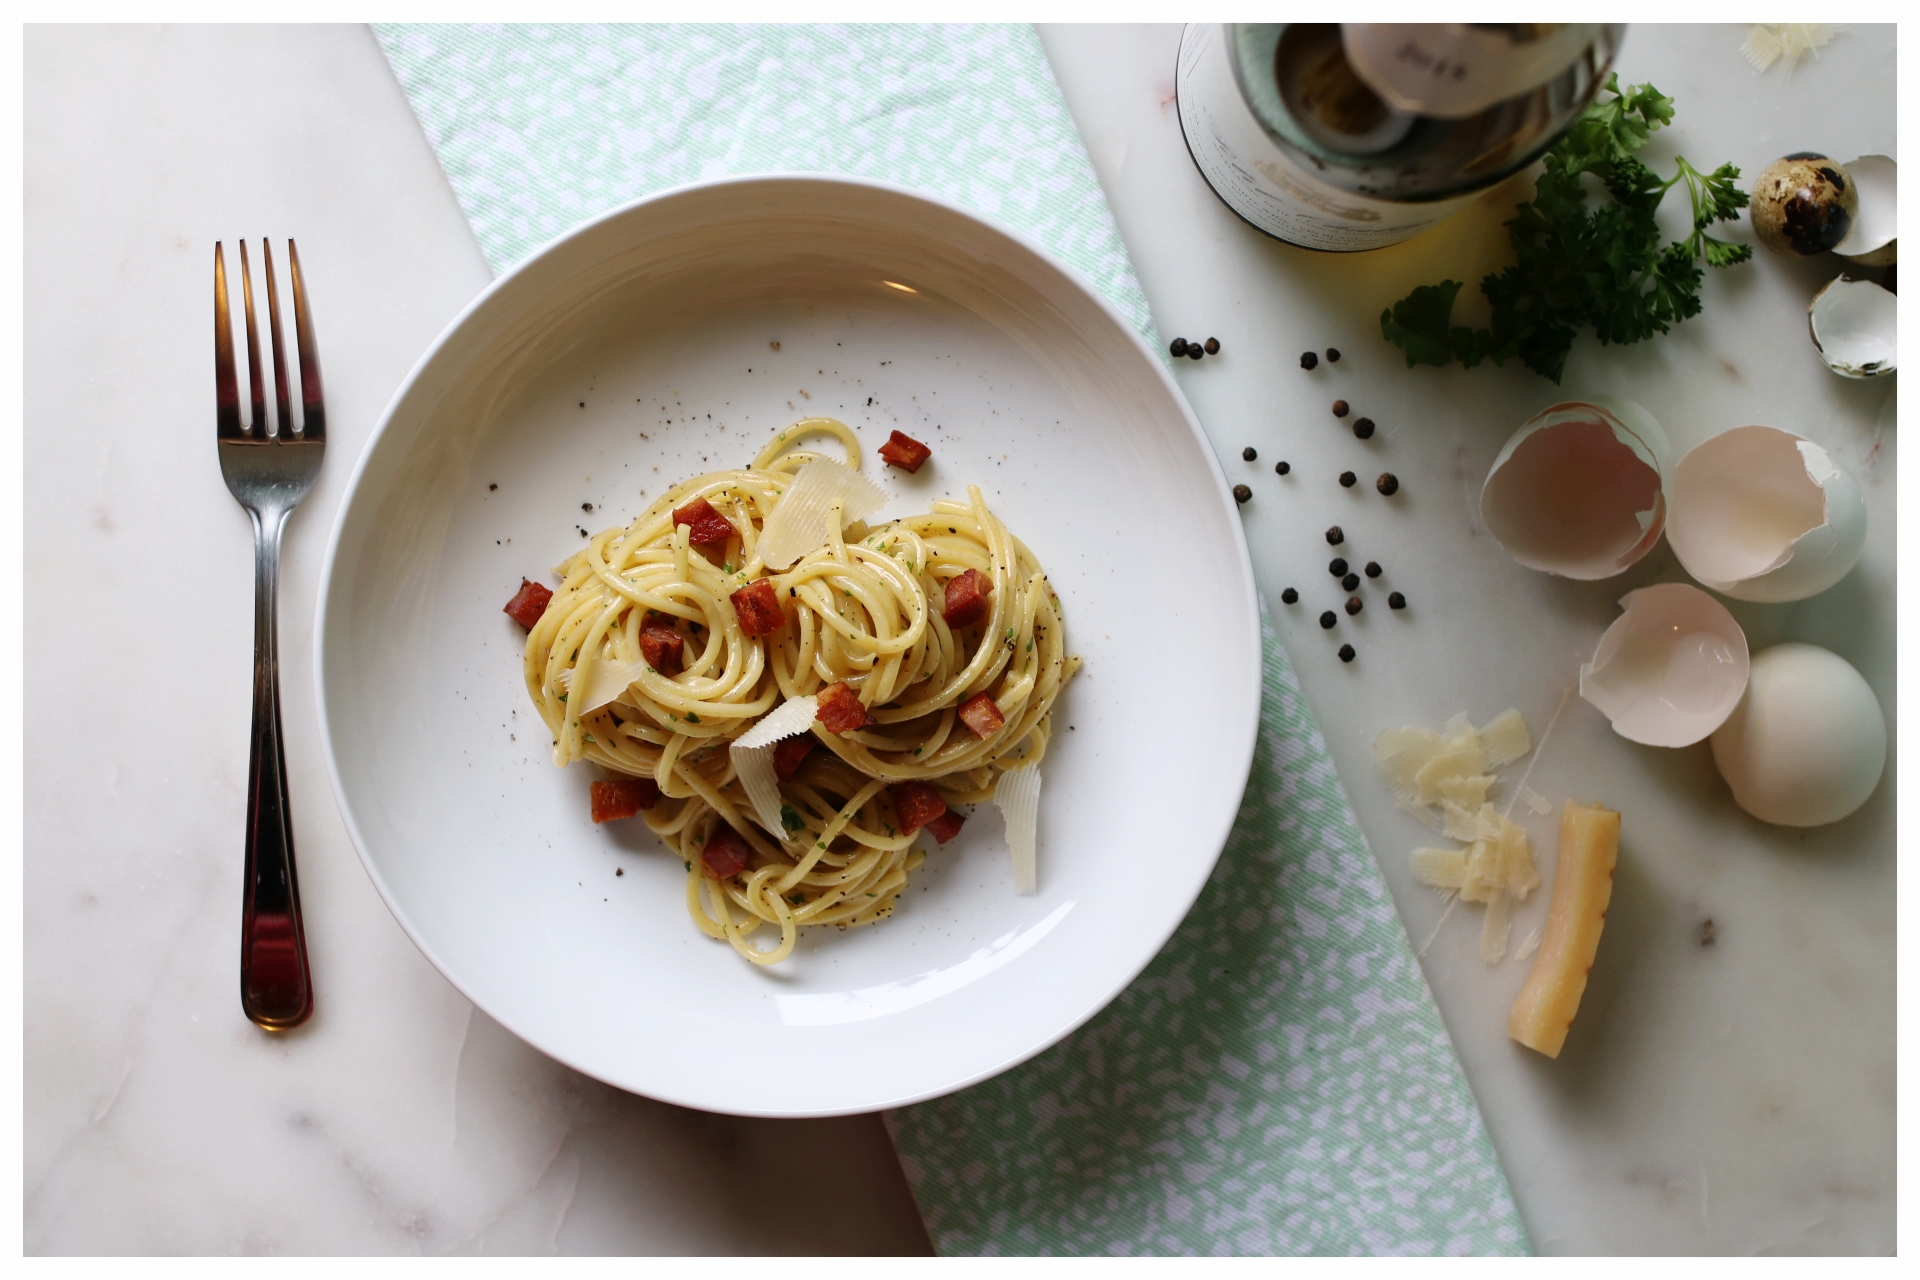
Honeymooning in Rome with Spaghetti Carbonara

Spaghetti Carbonara

Spaghetti Carbonara

On dreary February days such as this, I tend to find myself reminiscing about all of the delicious things I've eaten, wishing that I could just snap my fingers and have a buffet laid out with plates overflowing with every tasty morsel.  Alas, as much as I wish I were Hermione Granger or Molly Weasley, I am not.  In fact, I'm not even close as I would most definitely be placed in Hufflepuff if I were to ever get the chance to don that old Sorting Hat... 

Well, a girl can dream.  For now, I will have to settle with whipping up my own plates of deliciousness.

Today, my thoughts are filled with memories of my honeymoon.  The hubs and I went on a wee tour of Iceland, France, and Italy back in November and ate every single thing that struck our fancy.  Iceland's bounty offered up the most fantastic hearty breads and seafood, France had more butter, wine, and pastries than I could have ever imagined, and Italy's obvious prowess with pasta has yet to be surpassed.  On our first night in Rome, Aaron and I found ourselves toddling about in search of food and stumbled across a little restaurant a few blocks away from Piazza Navona.  We saw other diners voratiously digging in to plates piled high with peppery, yolky pasta topped with smokey guanciale and dusted with nutty pecornio.  Needless to say, Aaron was sold.  

While my recipe for spaghetti carbonara differs slightly from tradition by using easier to find pancetta in place of the guanciale, the hubs seems to be a pretty big fan.  This recipe is as simple as anything and brings us back to that night, sipping campari and meandering the moonlit streets of Rome.


Spaghetti Carbonara

Serves 4

400g dry spaghetti
5 egg yolks
1 tsp salt
½ - 1 tsp freshly ground black pepper
1 cup freshly grated pecorino cheese
1 tbsp finely chopped parsley
2 tsp extra virgin olive oil
150 - 200g pancetta, sliced about 1cm thick and diced into 1cm cubes
Reserved pasta cooking water

In a large heatproof bowl, whisk together the egg yolks, salt, pepper, pecorino, and parsley and set aside.  The mixture should be quite thick but don't worry - we'll thin it out with a little pasta water later.

Bring a large pot of salted water to a boil over high heat and cook the spaghetti until al dente.

Meanwhile, heat a large frying pan over medium heat, add the olive oil, and cook the chopped pancetta until golden and crisp.  Remove the pancetta from the pan and pour off all but 2 tablespoons of the fat.  If your think you're a little shy of 2 tablespoons, pour some extra olive oil into the hot pan.

When the pasta is done cooking, scoop out about ½ cup of the starchy pasta water and set aside while you drain the spaghetti.

Remove the frying pan from the heat, carefully add the pasta and cooked pancetta, and stir to coat with the hot oil.

While the spaghetti heats , slowly dribble about 3 - 4 tablespoons of the pasta water into the yolk mixture, whisking constantly to avoid curdling.

Pour the egg mixture into the pan with the spaghetti and mix for about 5 – 10 seconds only.  Quickly transfer everything back into the egg yolk bowl and continue to stir until each noodle is nicely coated.  This back-and-forth trick (eggs from bowl to pan to bowl) helps ensure that the sauce thickens and cooks without turning into scrambled eggs.

If your carbonara seems a bit thick, slowly add a little more of the pasta water until you reach your desired consistency. 

Serve topped with a little more pecorino, parsley, and black pepper for an quick, easy, and pretty darn tasty Rome-inspired dinner!

The tastiest little buns this side of the Mississippi

Easy Homemade Buns

Easy Homemade Buns

Remember about 13 or 14 years ago when everyone and their dog shunned even the thought of allowing a morsel of bread past their lips?  Well, a bandwagoner I am not so I never really got on board with this whole bread = bad thing.  I mean, come on!  Bread is AMAZING!  Don’t get me wrong, I totally understand that cutting out bread might very well lead to miraculous weight loss for some and there are a whole ton of people out there who literally can’t stomach the stuff due to allergies and sensitivities but, oh man, it is a pretty fantastic thing. 

Making bread yourself does take a little bit of time but it is as easy as anything!  Half of the process feels like you're a kid again playing with modelling clay and the rest is pretty much just waiting.  Even if it was more difficult, it would be totally worth it just to have your house basking in the heavenly smell of fresh bread as it bakes in your oven.

Here is my tried and true recipe for buns.  Feel free to divide the dough into 12 to make perfect burger-sized buns or 24 for the tastiest little dinner rolls you ever did eat!


Easy Homemade Buns

Makes 12 burger buns or 24 dinner rolls

¾ cup milk
¼ cup unsalted butter
¾ cup cold water
4 cups all-purpose flour, divided, plus some for shaping the buns*
2 ¼ tsp (1 package) quick-rise dry yeast
7 tsp sugar
1 ½ tsp salt
1 egg
egg wash (one egg beaten with 1 tbsp milk or water)
2 tbsp sesame and/or poppy seeds, optional

In a small pot over medium heat, heat the milk and butter until all of the butter is melted and the mixture is quite warm but not yet simmering.

Meanwhile, combine 2 cups of flour with the yeast, sugar, and salt in a large bowl or the bowl of your stand mixer.  Set aside.

Once the milk mixture is hot, remove it from the heat and pour in the cold water to bring the temperature down a bit.  This will help ensure that the yeast is activated without killing it with too much heat.

Pour the liquid into the flour mixture and stir together with a wooden spoon.  Stir in the remaining 2 cups of flour and begin to knead either with your hands or the dough hook attachment for your stand mixer.  The dough should be a bit tacky but if it seems too sticky, add a bit more flour while kneading.  The dough should be smooth and ready after about 6 minutes of kneading in your stand mixer or 8 minutes by hand.

Form the dough into a ball and plop into a lightly oiled bowl.  Cover tightly with plastic wrap and a clean kitchen towel and place in a warm, draft free place for 30 – 45 minutes or until the dough has doubled in size.

Punch down the dough and divide into 12 equal pieces for burger buns or 24 for dinner rolls and shape into smooth little buns… it was really difficult not to laugh after typing “smooth little buns”…

Place the buns on a greased cookie sheet leaving a few inches in between each and cover with the clean kitchen towel.  Pop the cookie sheet back into that warm, draft free spot and allow to rise for 25 minutes or so.

Meanwhile, preheat your oven to 400F and prepare your egg wash. 

Once risen, brush each bun with some egg wash and, if you fancy, sprinkle with sesame seeds and/or poppy seeds.  Bake burger sized buns for 13 – 16 minutes and dinner rolls for 10 – 12 minutes or until golden all the way around.

Allow the buns to cool slightly on a wire rack before diving in for the cook’s taste test (aka the saddest looking bun)!

*Feel free to try a mixture of whole wheat and white flours!  I’ve made this recipe with half whole wheat/half white and they turned out great – I would note that if you’re looking for a super tender and light bun, don’t go with 100% whole wheat as it tends to weigh these guys down.