Bannock: The quickest of quick breads

Bannock

Bannock

Bannock is kind of the perfect cross between a biscuit, a pancake, and an English muffin.  It’s amazing plain fresh out of the frying pan, smeared with lots of butter and jam, served alongside a saucy dinner used to swipe up every last tasty morsel, or even as a sandwich or burger bun.

It takes about as much work as pancakes so you’ll be able to impress your family and friends with pretty much zero effort on your part!


Bannock

Makes 12

3 cups all-purpose flour, plus more for shaping bannock
2 teaspoons salt
2 ½ tablespoons baking powder
¼ cup melted butter or lard
1 teaspoon honey
1 ½ cups warm water

In a large bowl, combine the flour, salt, and baking powder; make a well in the centre.  In a separate bowl, mix the melted butter with the honey and pour into the dry ingredients.  Add the water and stir just until a loose dough forms. 

Dust a clean work surface with flour, dump the dough out, and knead 7 or 8 times or until the dough is no longer sticky on the outside, adding a scattering of flour as needed.

Divide the dough into 12 equal portions and flatten into 1”-thick rounds.  This should leave you with rounds that are around 3-4” across.

Heat a cast iron skillet or frying pan over medium heat and add enough canola oil to coat the bottom of the pan.  When hot, fry the bannock a few at a time for about 3-4 minutes per side or until deep golden brown.  If your pan starts to look a little dry, add a bit more oil and allow it to heat up before frying more bannock. 

Allow the bannock to cool slightly and enjoy with anything your heart can imagine – or, if you’re feeling extra snazzy, split the bannock down the middle and use it as a bun for Bison Burgers!

The fluffiest little 3-Cheese Omelette you ever did see

Three Cheese Souffled Omelette

Three Cheese Souffled Omelette

We've all been there.  You've just woken up.  You're hungry.  You open the fridge and see a few perfect little eggs and a vegetable drawer filled with bits and bobs and inspiration strikes: "I'll make an omelette for breakfast!"

You grab some veg, maybe an onion, some mushrooms, a handful of greens, and hurriedly and haphazardly chop them all up.  You pop your pan onto the heat, crank it all the way up to high because, gosh darnit, you're hungry and want to dig into this bad boy as soon as possible!  

Fast forward to a warbly, flat-ish omelette filled with still-crunchy onions, sad and weepy mushrooms, wilted no-longer-green greens, and overcooked eggs.  

Less.  Than.  Appetizing.  And definitely not what the doctor ordered.

This here is my argument (read: recipe) for the most perfect omelette you'll ever have the joy of whipping up and gobbling down.  A souffled omelette not only looks spectacular from start to finish, it also cooks up in the blink of an eye and has the most wonderful, even consistency.

A soufleed omelette does not lend itself well to veg but, personally, I don't much care for them in my eggs anyway as I find that they are always under or overcooked.  I'd much rather dig into this cheesy lofty little number with a green salad or steamed asparagus on the side.

If the souffle aspect of this recipe seems a bit intimidating, believe me, it's as easy as anything!  Check out this segment on The Marilyn Denis Show where I prepare my Three Cheese Souffled Omelette to see just how simple it is!


Three Cheese Souffled Omelette

Makes 1 - 7” omelet

3 large eggs, separated
¼ teaspoon salt
1 teaspoon butter
2 tablespoons grated extra old cheddar
2 tablespoons grated gruyere
1 tablespoon grated parmesan
2 teaspoons finely chopped chives
Salt and pepper, to season

Heat a 7” nonstick skillet over medium low, arrange your top oven rack about 6-8” below your broiler, and turn the broiler on to high.

Meanwhile, separate your eggs by placing the yolks in a medium bowl and the whites into a very clean large metal or glass bowl.  When separating your eggs, it is important to make sure that no yolk gets into your whites.  Even the littlest bit of yolk or fat can stop your whites from whipping up.

Using a clean metal whisk or hand mixer, whip up the egg whites until they are fluffy and hold soft peaks.  Set those aside and whisk up the egg yolks with a bit of salt.  The yolks need to be whisked for about 10 seconds or so, just until they lighten up a bit. 

Using a metal spoon or large whisk, gently fold the yolks into the whites just until combined.  The mixture will fall a bit and lose some of its fluffiness but be careful not to over stir as this will ruin the soufflé.

Pop the butter into your preheated pan, swirl around a bit so that the bottom and edges are nicely coated, and gently pour the egg mixture into the pan.  Cook the omelette over medium low heat for 1 minute, gently sprinkle the cheeses on top, and pop the pan under the broiler for 3-4 minutes or until the cheese just begins to turn golden.

Remove the omelette from the oven and carefully fold it over on itself and transfer to a plate.  Top with a scattering of chives and a bit more salt and pepper, if desired.

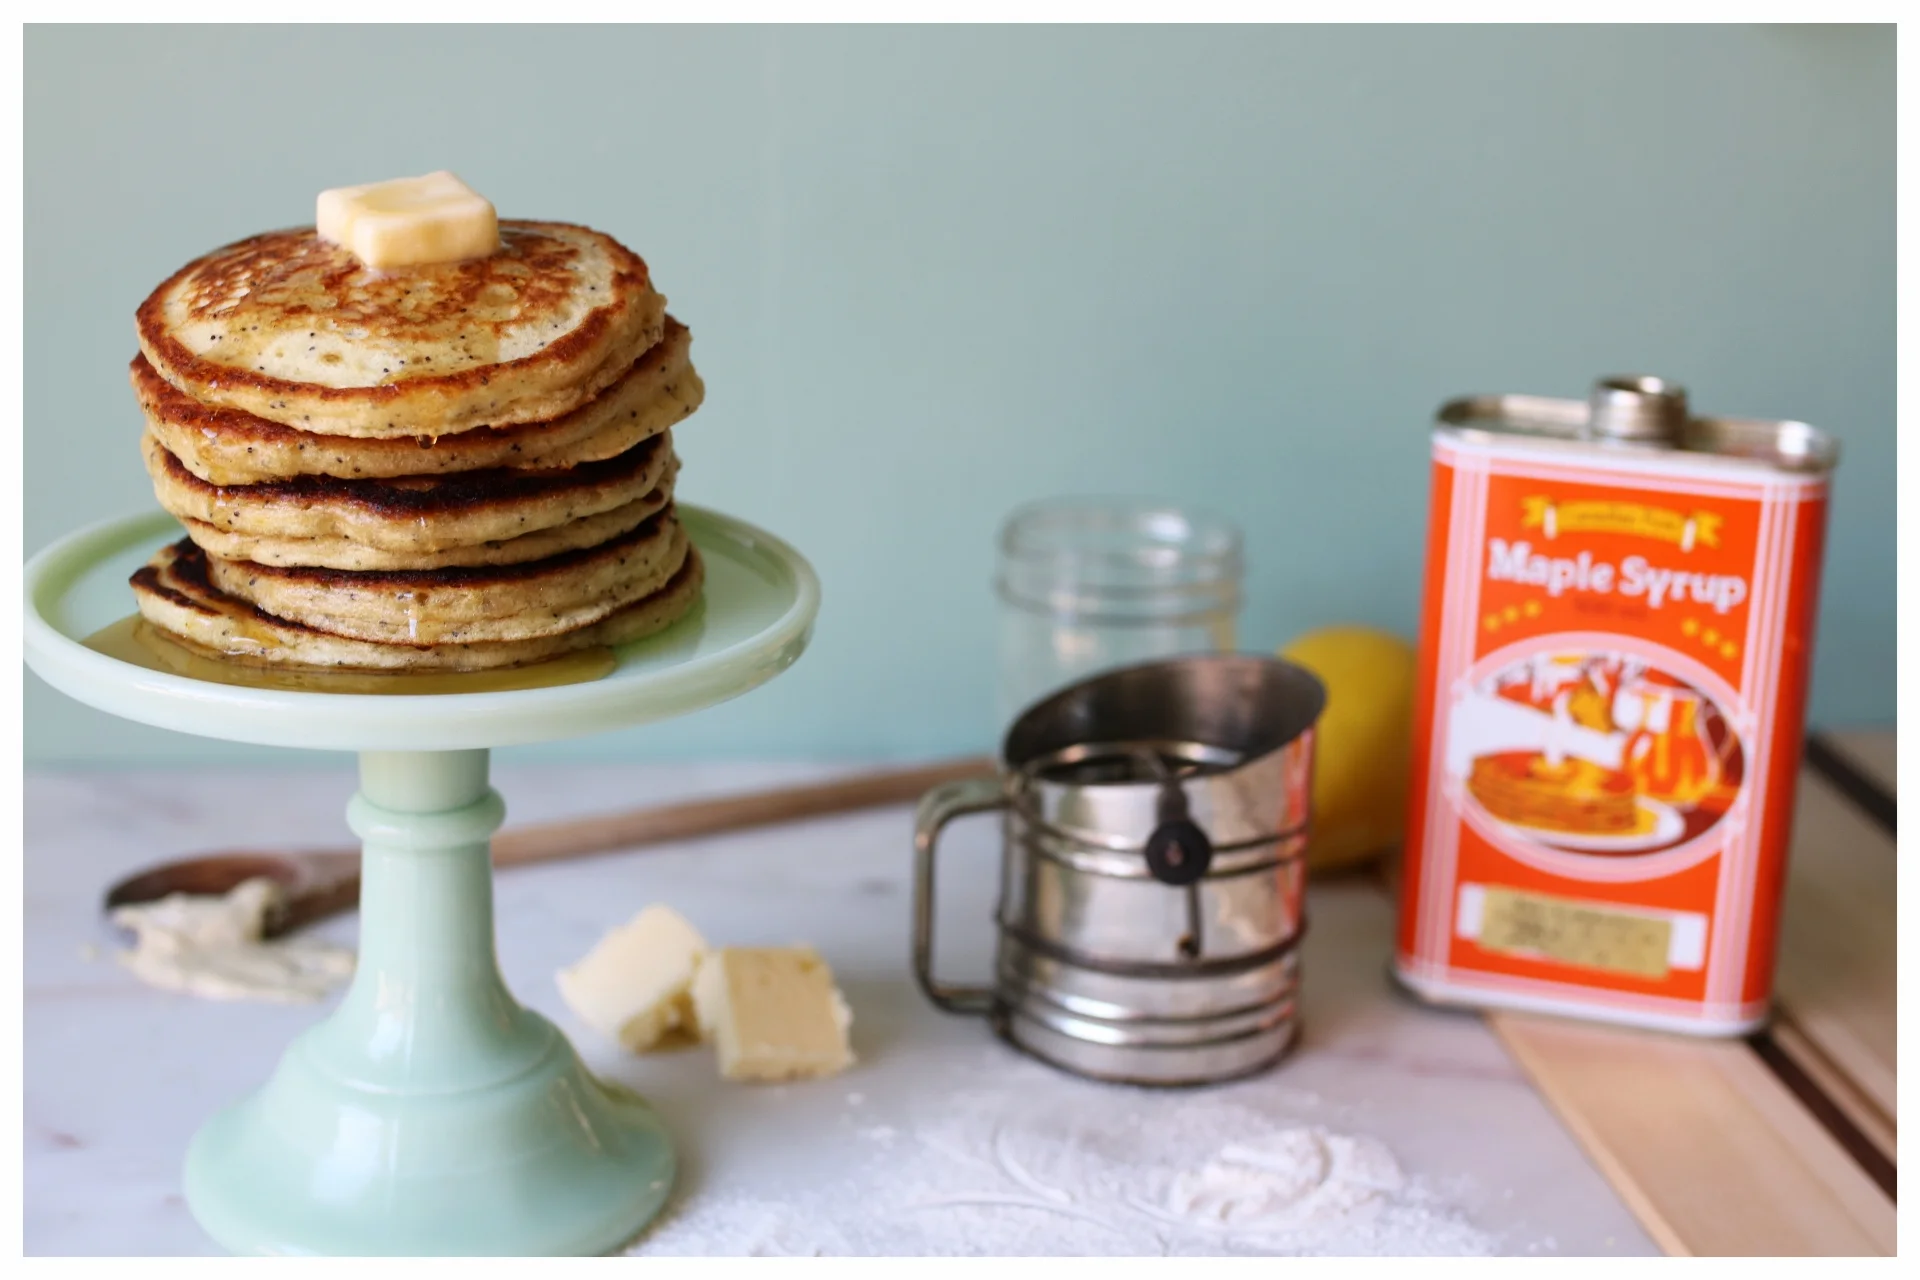
Breakfast for Dinner: Lemon Poppy Seed Pancakes

Lemon Poppy Seed Pancakes

Lemon Poppy Seed Pancakes

Mardi Gras.  Fat Tuesday.  Shrove Tuesday.  Whatever you call it, there is only one thing to do today: eat all of the pancakes. 

As a kid, my favourite meal was pancakes and “chachiches” (read: garbled baby-speak for breakfast sausages) so Pancake Tuesday has always been a favourite of mine.  To be honest, I think the tradition of tucking into a big old stack of fluffly little cakes for dinner on a mid-winter Tuesday is one of the only unchanged holiday rituals us Berg’s have.  Christmas has been bent to accommodate new families, Easter is spent sans Mama Berg as she usually skidaddles down South for a girl’s trip, and Thanksgiving is kind of just a free-for-all.  Somehow, thankfully, Pancake Tuesday has stood the test of time.

The idea of “Fat” days has been recently expanded by my hubs’ Polish heritage.  He introduced me to “Fat Thursday” where you are meant to indulge in these gigantic Polish doughnuts called Paczki.  Holy bananas, are they ever tasty but do be warned: some that appear to be filled with chocolate are in fact filled with pureed prune.  It’s not a wholly unpleasant flavour but it is quite a shock when you are expecting a rich chocolate ganache and are instead met with the unctuous, I guess sort of sweet, funk of a prune.

As per usual, I digress.  Back to pancakes.

Here is my recipe for my current fave ‘cakes, lemon poppy seed.  The zest of a lemon and speckley little poppy seeds makes this childhood favourite seem just a little more ‘adult’.  Stacking them high and drowning with melting butter and warm maple syrup on the other hand is a total 4-year-old Mary move. 

One can’t be expected to be grownup all the time.


Lemon Poppy Seed Pancakes

Makes 10 – 12 pancakes

2 Tbsp unsalted butter, melted
1 ¼ cup all-purpose flour
1 tsp baking powder
½ tsp baking soda
¼ tsp salt
2 Tbsp sugar
2 tsp poppy seeds
1 ½ cup buttermilk
1 egg
½ tsp vanilla
1 lemon, zested
Butter and canola oil, for cooking the ‘cakes

In a large non-stick skillet over low heat, melt 2 tablespoons of butter and preheat your oven to 200F.

Meanwhile, whisk together the flour, baking powder, baking soda, salt, sugar, and poppy seeds in a medium bowl and set aside.

In a small bowl, whisk together the buttermilk, egg, vanilla, and lemon zest.  Pour this wet mixture over the dry and stir about five times to slightly combine.  Pour in the melted butter, placing the pan back over the heat, and stir the pancake batter just until it comes together but a few lumps still remain.

Turn the heat on the pan up to medium and pop a little pat of butter and a splash of oil in there to melt together.  When the butter is bubbling, spoon about a ¼ cup of batter onto the skillet for each pancake and cook until bubbles start to appear on top.  Check the underside to see if they are golden brown and flip.  Cook about another 1 – 2 minutes on the second side and keep the pancakes warm in your oven until all of the batter is used up.

Serve warm with lots of butter, maple syrup, fruit, and maybe some lemon curd!

Notes: If you’re looking for plain old pancakes, just omit the poppy seeds and lemon zest.
If you find yourself with any leftovers, place a small square of wax or parchment paper between each pancake, wrap the stack well with plastic, and pop in the freezer.  To reheat, just use your toaster!

Cinnamon buns are always a good idea

Cinnamon spice buns with raspberry, orange, and walnuts

Cinnamon spice buns with raspberry, orange, and walnuts

Ah, cinnamon buns.  Is there anything better than waking up to a home bathed in that cinnamony warmth?  I mean, it's the weekend and while I am a bit of an early riser, the promise of an ooey gooey, freshly baked cinnamon bun is sure to get me out of bed with a smile on my face.

This base recipe is fantastic as is but also lends itself perfectly to the whims of the baker.  This weekend, I found myself with a surplus of raspberries and oranges so I snazzed up my traditional cinnamon buns with a bit of fresh raspberry jam, orange zest, nutmeg, ginger, and clove, and a handful or two of toasty walnuts.

If you're the earliest bird, feel free to make these from start to finish first thing in the morning but if you're less inclined towards a 5am alarm, I'd suggest taking a peek at my notes on an overnight rise.  This offers you all the glory and praise due after pulling freshly baked buns from the oven before noon but allows you a more human weekend wake-up time.


Cinnamon Buns or, you know, whatever type of breakfast bun your heart desires

Dough
¼ cup sugar
4 large egg yolks
1 whole large egg
¼ cup + 2 Tbsp melted unsalted butter
¾ cup buttermilk
1 tsp vanilla extract
3 ¼ - 4 cups all-purpose flour, divided
2 ½ tsp dry rapid-rise yeast
1 ¼ tsp salt

Filling
1 cup brown sugar
1/8 tsp salt
4 tsp cinnamon
5 tsp melted unsalted butter

*The filling is where you can get creative.  Feel free to change it up with nuts, dried fruit, a thin swipe of jam, spices, or citrus zest.  For the buns pictured above, I mixed the brown sugar and salt with 3 teaspoons of cinnamon and a quarter teaspoon each of ground ginger, ground cloves, and freshly grated nutmeg.  I then rolled out the dough, spread a thin layer of raspberry jam across the top, lightly brushed that with the melted butter, scattered the sugar mixture over top, and dotted the whole thing with fresh raspberries and walnuts.

Icing
¼ cup softened cream cheese
2 Tbsp room temperature unsalted butter
3 Tbsp milk
½ tsp vanilla extract
1 Tbsp maple syrup
1 ¼ cup – 1 ½ cup powdered sugar
Pinch of salt

*As with the filling, feel free to jazz up the icing with different extracts or citrus zests. 


In a stand mixer, whisk the sugar, egg yolks, and whole egg together until light and fluffy.  While whisking, slowly pour in the melted butter followed by the buttermilk and vanilla.

Remove the whisk attachment from your mixer and add 2 cups of the flour and the instant yeast.  Holding the hook attachment in your hand, vigorously stir this mixture until it comes together.  Once mixed, attached the dough hook to the stand mixer and add 1 ¼ cup of the remaining flour as well as the salt and knead the dough on low/medium-low for 5 minutes.  At this point, the dough should be soft and moist but not sticky – if it is sticky, slowly add some more flour, ¼ cup at a time, until it no longer sticks to your hands.  Whether or not you add more flour, continue to knead the dough on low for an additional 5 minutes.

Turn the dough out onto a lightly floured surface, knead a few times, and shape into a tight-skinned ball.  Place the dough in an oiled bowl, cover tightly with plastic wrap and a clean kitchen towel, and allow the dough to rise in a warm place for about 2 – 2 ½ hours.

While the dough is rising, mix up the filling by combining the brown sugar, cinnamon or other spices, zest, if using, and salt in a bowl and set aside.

Prepare a 9x13” pan by generously greasing and lining with parchment paper.  I like to spritz a bit more cooking spray on the parchment paper just to make sure that all of my buns come out of the pan easily.

Once your dough has risen, melt the 5 teaspoons of butter for the filling and punch down the dough.

Form the dough into a 12x18” rectangle, brush with melted butter, and evenly sprinkle with the filling mixture.  If you want to add nuts or fruit to your buns, now’s the time.

With the long side of the dough towards you, tightly roll it into a snake, seal the seam by pinching the dough together, and cut into 12 even slices.  Arrange the buns about an inch or two apart in the prepared pan, cover with plastic wrap, and place the buns back in that warm spot for another 2 hours or so. 
*If you are preparing your buns the night before to bake fresh in the morning, see the note below for instructions.

When ready to bake, preheat your oven to 350F and bake your buns for 25-30 minutes or until golden brown and glorious.

As soon as the buns come out of the oven, carefully flip the pan over onto a baking sheet or cutting board and tap to release all of that ooey goodness.

While the buns cool slightly, whip up a batch of icing by combining all of the ingredients in a small bowl and whisking until smooth.

Serve warm smeared with a good dollop of icing and enjoy with a hot cup of coffee if you’re so inclined.

Notes on an overnight rise

Once you have arranged your buns in the prepared pan, cover with plastic, and refrigerate overnight or up to 14 hours.

When ready to bake, boil a kettle of water and place a second 9x13” pan on the bottom rack of your turned-off oven.  Remove your buns from the fridge and discard the plastic wrap.  When the water has boiled, pop the bun pan onto the middle rack of your oven and carefully fill the empty 9x13” pan about halfway with the boiling water.  Shut the oven door and allow the buns to proof (rise) for 30 minutes.
This creates an at-home proofing station and can be used for any doughs coming out of the fridge!

Once your buns have been proofed, remove both 9x13” pans from the oven and preheat it to 350F, baking the buns as above.